![]()
This guide will show you how to kick-start your Unreal Tournament 1999 server.
Click here to order your Unreal Tournament 1999 server with Citadel Servers today!
Unreal Tournament (1999) remains one of the defining pillars of arena shooters, a lightning‑fast blend of precision gunplay, inventive weapons, and competitive multiplayer design that helped shape modern FPS games. More than two decades later, its movement, map flow, and skill‑based combat still feel remarkably fresh, drawing both returning veterans and curious newcomers into its high‑energy matches. This Quickstart Guide is designed to get you into the action as quickly and confidently as possible. Whether you’re revisiting UT after years away or experiencing it for the first time, you’ll find everything you need to jump in: the essential settings to tweak, the core movement and weapon fundamentals, and the fastest path to understanding how UT’s iconic game modes and maps work. The goal is simple: help you spend less time configuring and more time fragging. Along the way, you’ll pick up practical tips that smooth the learning curve, highlight what makes UT’s combat so uniquely satisfying, and prepare you for both offline bot matches and online play. By the end, you’ll be ready to dive into the arenas with confidence, speed, and a solid grasp of the game’s rhythm.
How to Connect to your Unreal Tournament 1999 Server
1. Log in to your Game Control Panel and navigate to your service.
2. Copy the Connection Info or Query Info IP and port exactly as listed.
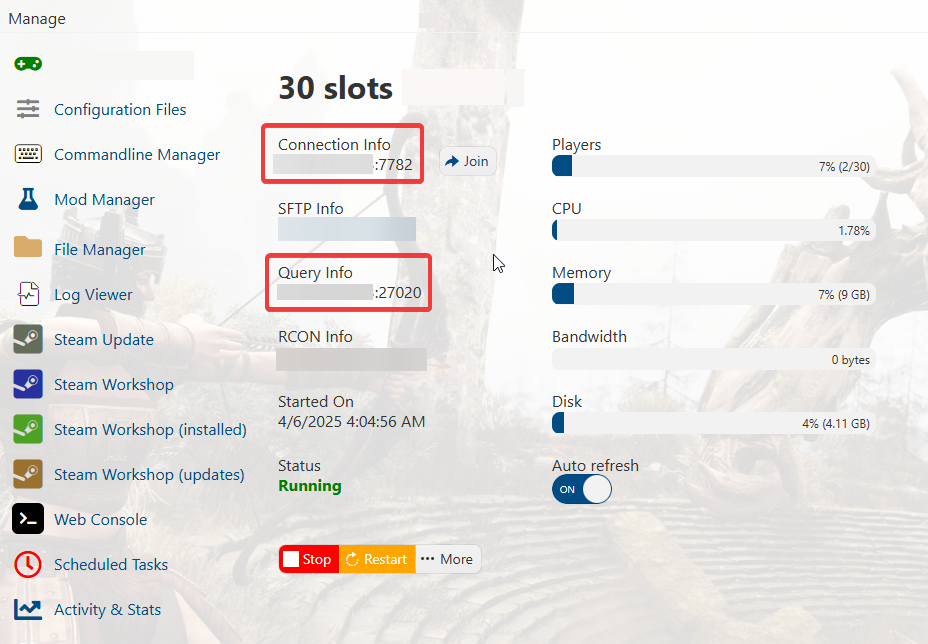
3. You can use the Connection Info to connect directly through the game's in‑game server browser or via the Launcher.
Configuring your Server Settings
1. Log in to your Game Control Panel and navigate to your service.
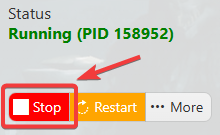
2. Before making any modifications, stop the server from running by clicking the Stop button.
3. Navigate to the Commandline Manager Tab and the Configuration Files Tab.


4. For the Configuration Files, select the Config Editor button. A pop‑up will open displaying key settings, such as the server name, password, and other basic options, that you can adjust quickly through the interface. If you prefer full control, you can switch to the Text Editor to edit the configuration file’s contents directly.
5. In the Commandline Manager, select the command line you want to activate. Most control panels provide at least two options: a default command line for standard server operation and a modded command line for servers running custom content or additional features. Choosing the appropriate line ensures the server launches with the correct parameters and behavior.
Press Modify on the command line you want to use, then adjust the available settings such as the server name, password, and other launch parameters. You can also choose which mods and configuration files should load with that command line. When you’re finished making changes, select Apply at the bottom to save and activate your updated command line.
Did the above information not work for you?
Please click here to contact our support via a ticket.
