
Mods are a fantastic way to customize and expand your Stationeers gameplay experience. Whether you're looking to add new features, improve performance, or simply spice things up with creative content, installing mods on your server can open up a whole new world of possibilities. This guide will walk you through the step-by-step process of adding mods to your Stationeers server using the Steam Workshop and your server's configuration files. No advanced technical skills required just a few simple steps and you'll be ready to explore Stationeers like never before!
Installing Mods on your Stationeers Server
1. Go to Steam Workshop and select your preferred mods.
2. Copy the Mod Ids of your preferred mods.
![]()
3. Log in to your Game Control Panel and navigate to your service.
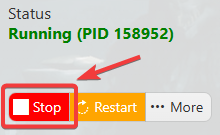
4. Before making any modifications, stop the server from running by clicking the Stop button.
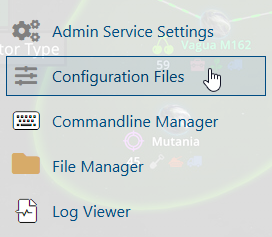
5. Navigate to Configuration Files.
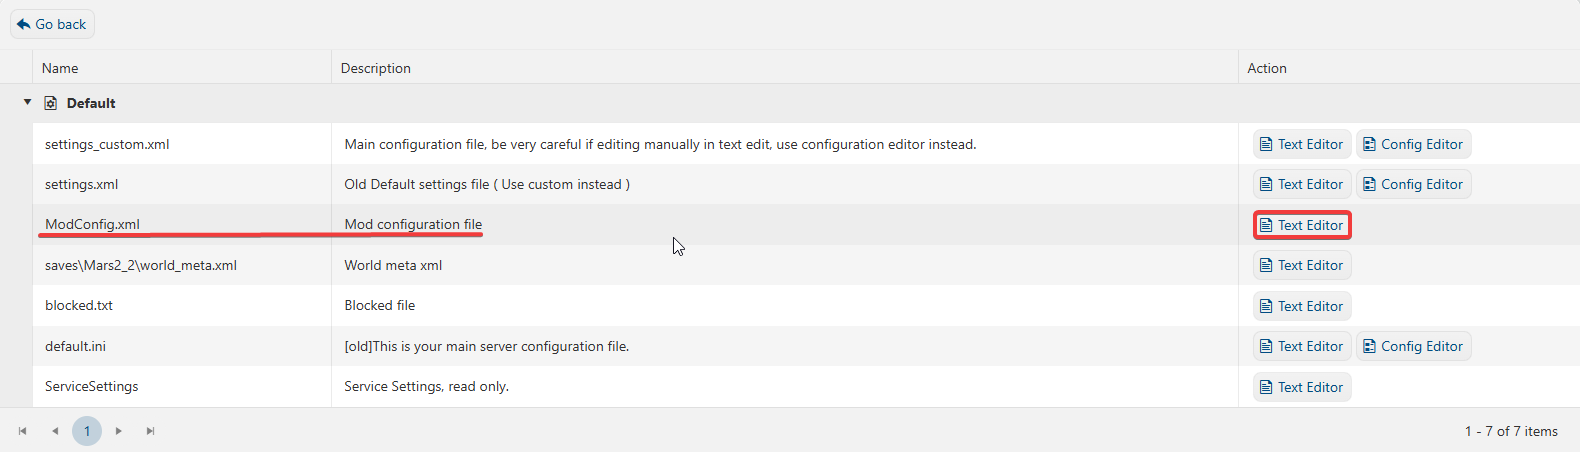
6. On the Configuration Files, look for ModConfig.xml file and click the Text Editor.
7. On the ModConfig.xml, follow these scripts/codes. (In this example, we will be using Ambient Light Fix Mod)
E.g.
A. You need to new entry per mod that you wanted to load, increasing the number by 1 on each entry.
<Mods>
<unsignedLong>1</unsignedLong>
<unsignedLong>1001</unsignedLong>
</Mods>
B. Next, add a new entry for each mod you wish to install. For each entry, insert the ModID into both the folder field and the mod ID field. These ModIDs are the same ones you copied from the Steam Workshop in the previous step.
<LocalMods>
<LocalMod>
<folder>3570726509</folder>
<modID>1001</modID>
</LocalMod>
</LocalMods>
C. The full scripts/codes should look something like this:
<?xml version="1.0" encoding="utf-8"?>
<ModConfig xmlns:xsi="http://www.w3.org/2001/XMLSchema-instance" xmlns:xsd="http://www.w3.org/2001/XMLSchema">
<Mods>
<unsignedLong>1</unsignedLong>
<unsignedLong>1001</unsignedLong>
</Mods>
<DisabledMods>
</DisabledMods>
<LocalMods>
<LocalMod>
<folder>3570726509</folder>
<modID>1001</modID>
</LocalMod>
</LocalMods>
</ModConfig>
Just follow the same patterns on Step A and B if you have more than 1 mod that you wanted to install.
8. After editing, click the Save button to apply the changes.

Start your server and enjoy your mods!
